
If you have Synology NAS with 2 (or more) Ethernet ports (like mine, DS916+), you can pair them in the Bridge.
In the following steps I will show you how to bridge your second Ethernet port (LAN 2, or eth1) to your first Ethernet port (LAN 1, or eth0), so LAN 1 will be your main ethernet port where you connect your Internet (or switch) cable to, LAN 2 is your second ethernet port where you can connect any other device (i.e. PC, laptop, NVR, etc.) to your Synology NAS using the ethernet cable and all the traffic will be routed thourgh LAN 1 (eth0).
Let’s Bridge it
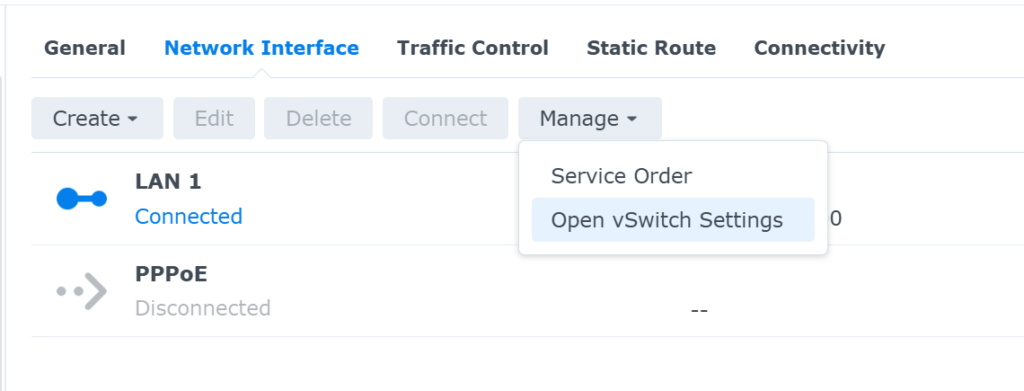
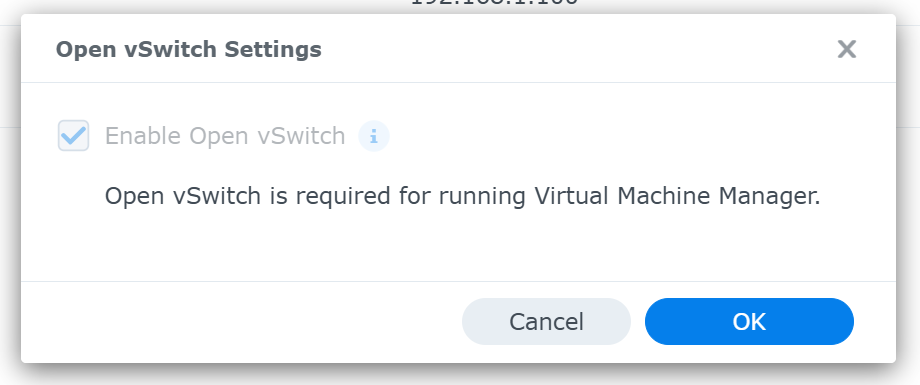
Go to Control Panel / Network, click Manage / Open vSwitch Settings to check whether it is enabled or not, if not – enable it:
Now you should be able to run the following commands in ssh terminal.
First connect to your synology ssh:
ssh <user>@<synology-IP> -p <synology-Port>Now show your existing Ethernet Bridges (Synology NAS might create some already for its virtual machine):
sudo ovs-vsctl showYou should see someting like this:
a6344763-bfcd-496d-afa7-fecec4a9489b
    Bridge "ovs_eth1"
        Port "eth1"
            Interface "eth1"
        Port "ovs_eth1"
            Interface "ovs_eth1"
                type: internal
    Bridge "ovs_eth0"
        Port "eth0"
            Interface "eth0"
        Port "ovs_eth0"
            Interface "ovs_eth0"
                type: internal
So here we see 2 virtual network bridges, “ovs_eth1” and “ovs_eth0”, we need to keep “ovs_eth0”, so this will be the source of our internet and routing to for the traffic coming from eth1.
Bridge “ovs_eth1” we will remove to utilize eth1 for bridging to eth0, that means that we will need to add port eth1 to the Bridge “ovs_eth0”.
Let’s remove Bridge “ovs_eth1”:
sudo ovs-vsctl del-br ovs_eth1Now let’s see what bridges we have now:
a6344763-bfcd-496d-afa7-fecec4a9489b
    Bridge "ovs_eth0"
        Port "eth0"
            Interface "eth0"
        Port "ovs_eth0"
            Interface "ovs_eth0"
                type: internal
Let’s add port eth1 to our Bridge “ovs_eth0”:
sudo ovs-vsctl add-port ovs_eth0 eth1And see what happened:
a6344763-bfcd-496d-afa7-fecec4a9489b
    Bridge "ovs_eth0"
        Port "eth0"
            Interface "eth0"
        Port "eth1"
            Interface "eth1"
        Port "ovs_eth0"
            Interface "ovs_eth0"
                type: internal
And now you should be able to see only 1 Ethernet port in your Synology NAS:
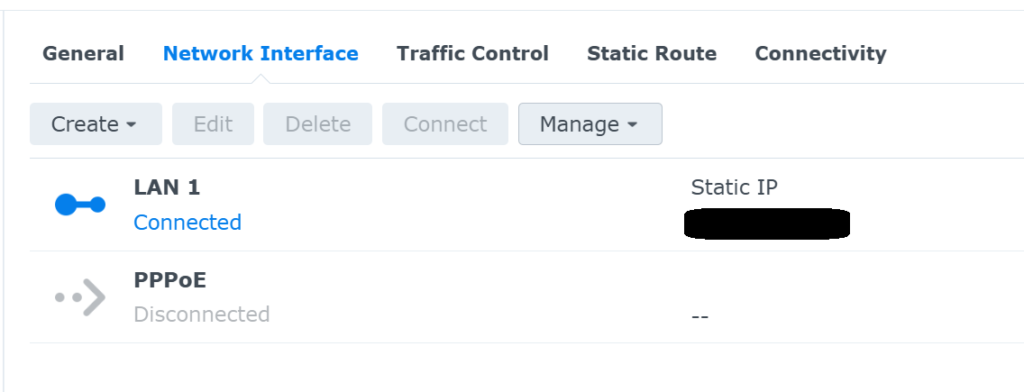
That means that the second port (LAN 2, or eth1) is now used in your Bridge, bridged to LAN 1 (or eth0), all traffic coming from/to LAN 2 will be routed to the network of LAN 1.
After Reboot
Uptill now all works well, but after reboot you’ll most probably loose all your settings you just did, to avoid this just put these settings into the network scripts Synology using when up/down the NAS.
Go to /etc/sysconfig/network-scripts and make the following changes to your ifcfg-eth1 file (using sudo ofcourse):
DEVICE=eth1
BOOTPROTO=dhcp
ONBOOT=yes
BRIDGE=ovs_eth0
This will add your port LAN 2 into the ovs_eth0 bridge.
Now remove your bridge ovs_eth1 by renaming the script ifcfg-ovs_eth1 to _ifcfg-ovs_eth1_ (or delete it, or rename whatever you like, just not starting with ifcfg-):
sudo mv ifcfg-ovs_eth1 _ifcfg-ovs_eth1_So you should see the list of scripts like this:
-rw-r--r-- 1 root root   54 Dec 11  2016 ifcfg-eth0
-rw-r--r-- 1 root root   54 Mar 13 10:47 ifcfg-eth1
lrwxrwxrwx 1 root root   22 Nov 26  2016 ifcfg-lo -> ../networking/ifcfg-lo
-rw-r--r-- 1 root root  122 Jan  1  2015 ifcfg-ovs_eth0
-rw-r--r-- 1 root root   77 Jul  3  2021 _ifcfg-ovs_eth1_
-rw-r--r-- 1 root root    0 Jun  8  2018 ifcfg-ppp201
-rw-r--r-- 1 root root   42 Mar 25  2016 ifcfg-tun
Now all your Bdrige configuration should remain after reboot.
Back to normal
In case if you need to revert all your changes – just do the steps above in reverse (up to the commands of sudo ovs-vsctl ... , it is not necessary after reboot).
Or if you need to keep LAN 2 and bridge LAN 1 to LAN 2 – you know what to do )).
Leave a Reply
You must be logged in to post a comment.